A Homeowner’s Checklist for Post-Hailstorm Roof Inspection in Winnipeg
In Winnipeg, hail doesn’t just rattle windows—it rewrites rooftops. One fast-moving summer cell can turn your lawn into a marble rink, leave your eavestroughs peppered, and your shingles quietly bruised. The morning after, everything can look deceptively normal from the driveway, yet the real story is sitting where you can’t easily see it: on the ridge, under the shingles, and inside the attic.
Why does this matter now? Because tiny impact marks today can become big problems under a Manitoba winter. Granule loss that seems cosmetic in July turns into leaks during a January deep freeze. Prairie winds tug at loosened flashing. Melt–refreeze cycles find every nick and nail hole. In a city where spring thaws and summer squalls are a way of life, a careful, post-hail inspection isn’t overcautious—it’s essential home maintenance.
There’s also timing. Insurers expect prompt reporting, contractors book up fast after a storm, and “storm chasers” start knocking. The difference between a smooth claim and a costly headache often comes down to what you document in the first 48 hours and what you know to look for—on your shingles, around vents and skylights, along soffits, siding, and the ground where clues collect. Whether you’re in River Heights, St. Vital, or Transcona, a clear, local-savvy checklist keeps you safe, efficient, and in control.
This guide gives you exactly that: a homeowner’s ground-to-ridge checklist for post-hailstorm roof inspection in Winnipeg—what to scan from the sidewalk, what to photograph up close, what not to touch, and when it’s time to call a pro. Spend 20 minutes now, and you’ll save weeks of hassle later. Ready to turn last night’s storm into a smarter, safer home? Let’s begin.
Key Takeaways:
- After a hailstorm, put safety first, photograph all visible damage from the ground, and arrange a professional roof inspection within 72 hours — hailstones larger than 25 mm (about 1″) are big enough to fracture asphalt shingles and dent metal flashing.
- Inspect for granule loss, cracked or missing shingles, dented vents/gutters, damaged flashing, and soft spots; heavy granule loss significantly shortens shingle life and often leads to premature repairs or replacement.
- Report damage to your insurer promptly and keep thorough documentation; Winnipeg’s storm season runs roughly May–August, and Prairie regions experience higher hail frequency, so quick action reduces the risk of secondary water damage and supports any claim.
Assessing Damage: What to Look For
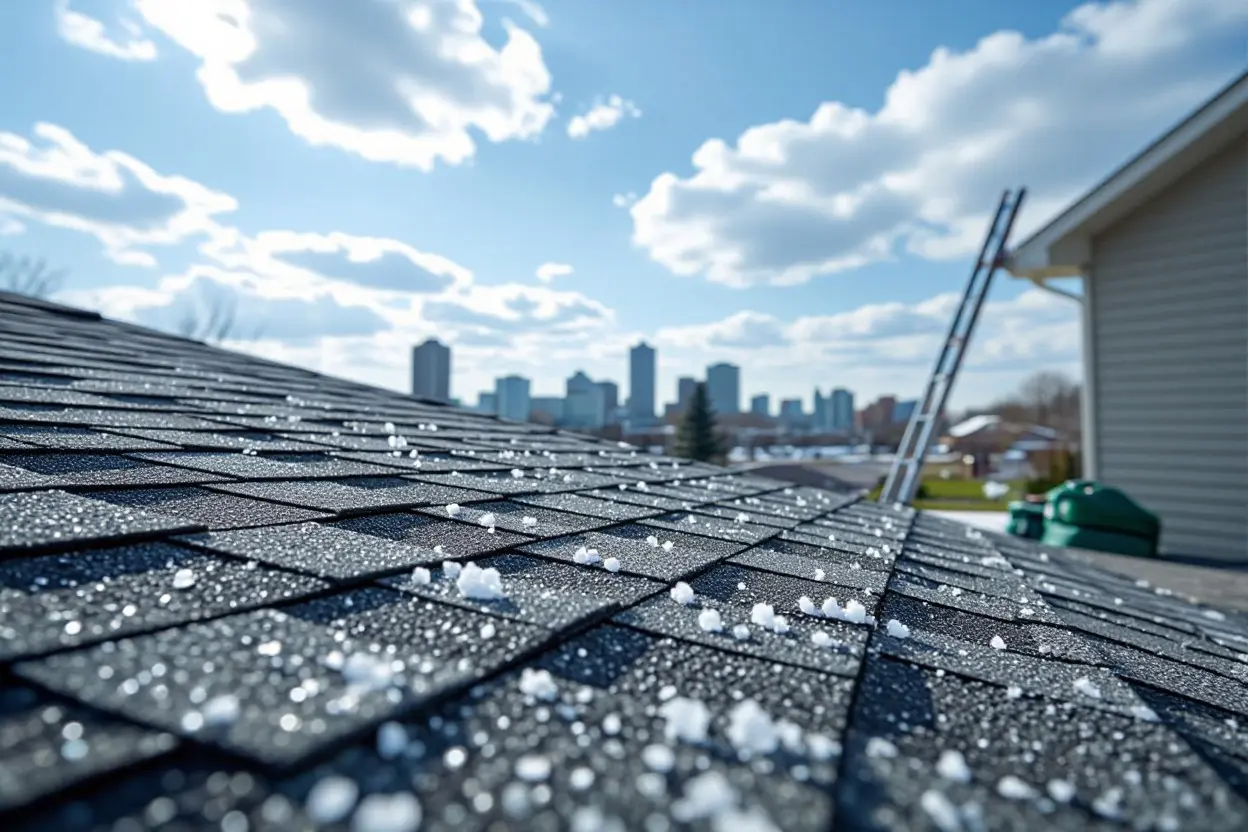
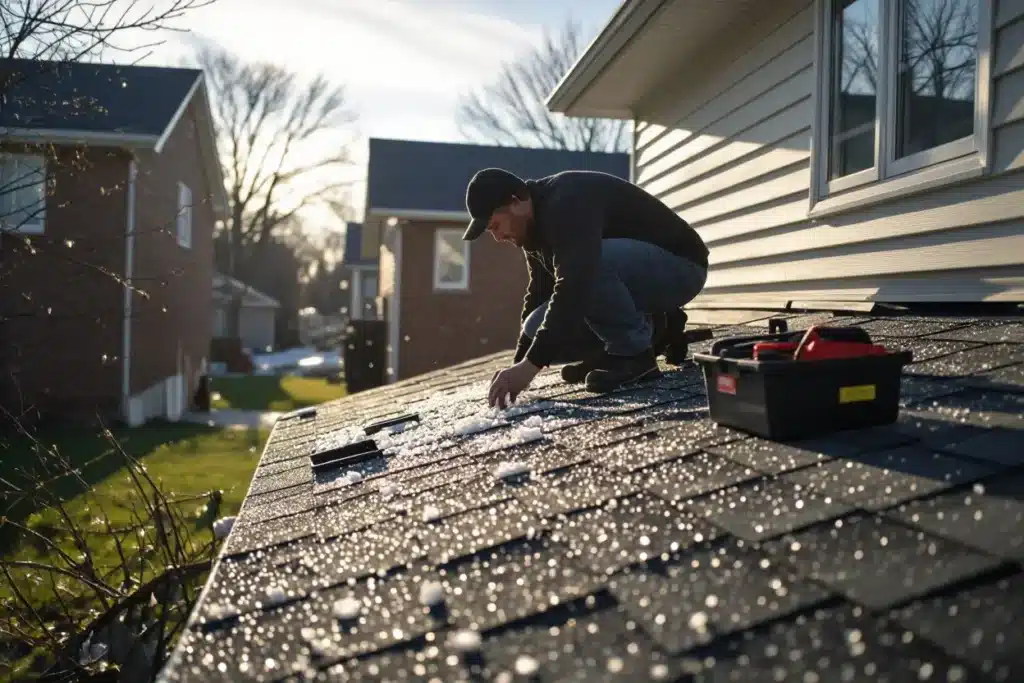
Survey the exterior from the ground first: scan the roofline with binoculars, check gutters for shredded granules, and look for dark streaks or missing pieces on the ridge and hips. Photograph every angle and include a ruler or coin next to obvious impacts so you can show size and pattern to your insurer; hail larger than 1″ (25 mm) often causes shingle bruising, while impacts above 1.75″ (45 mm) typically produce holes or torn asphalt. Pay attention to metal components — dented vents, HVAC housings, and flashings are common and visible evidence that the storm energy was sufficient to damage roofing materials.
Move inside to the attic if you can access it safely. Inspect the deck for dark water stains, soft spots when you press, and any magnetic debris from underlayment. A single struck shingle can allow water migration during the next big rain; spotting brown stains, wet insulation, or daylight through the sheathing indicates active leaks and a need for immediate repair. In Winnipeg’s May–September storm season, you’ll want to document and file claims quickly — the faster you gather proof, the easier it is to capture the full extent of loss before temporary fixes or further weather obscure the evidence.
Identifying Visible Roof Defects
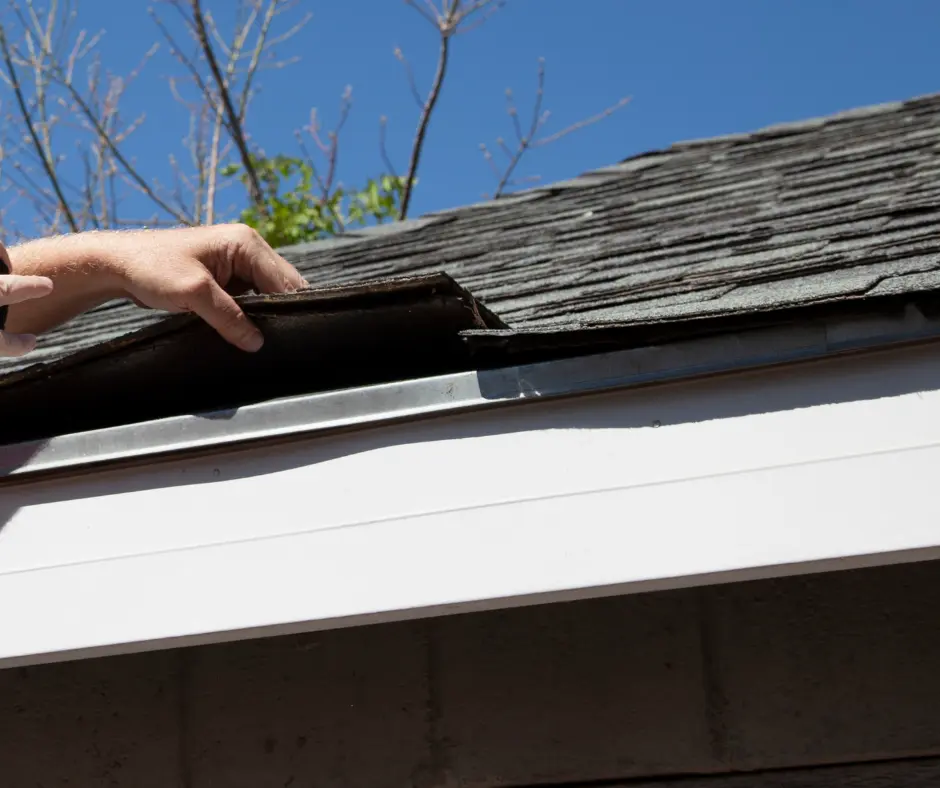
Look for missing granules clustered in downspouts or at the base of the chimney — that granular loss accelerates UV exposure and shortens shingle life. Shingles with a soft, dented center or a circular fracture pattern point to hail strike damage; golf-ball-sized hail commonly leaves a rounded bruise, while dime-to-quarter-sized stones often scuff granules without immediate perforation. Check ridge caps and hip shingles for splits, and scan valleys and around penetrations for torn or lifted flashing, which are frequent failure points during wind-driven rain following hail events.
Inspect gutters, soffits, and fascia for dents or cracked paint that indicate impact force sufficient to affect connected systems. Metal vents, satellite dishes, and AC housings will often show the first signs of a severe storm — if you see widespread denting on metal work, expect underlying shingle damage as well. Take close-up photos of representative defects and mark their locations on a roof diagram so you and your contractor can correlate surface hits with suspected underlayment or decking issues.
Understanding the Impact on Structural Integrity
Repeated hail impacts can fracture the shingle’s asphalt and mat, creating micro-cracks that allow moisture to penetrate the underlayment and roof deck; once moisture reaches the plywood or OSB decking, delamination and rot can develop within weeks in Manitoba’s humid summer conditions. Sagging spots, a musty attic smell, or insulation that remains damp after dry weather are strong indicators that the storm damage has progressed beyond cosmetic shingle problems into structural compromise.
Compromised flashing, torn underlayment, and broken fasteners increase the risk of ice dam formation in Winnipeg winters, which multiplies repair costs as trapped meltwater backs up under shingles. You should expect a professional inspection to check not just surface shingles but the deck, trusses, and eaves; what looks minor from the street can translate into thousands of dollars in hidden repair needs if decking replacement or structural reinforcement is required.
For deeper evaluation, request moisture readings and, if available, infrared or drone imaging — these techniques commonly reveal sub-surface moisture pockets and soft spots that routine visual checks miss. A written condition report with photos, annotated diagrams, and recommended repairs gives you the documentation insurers ask for and helps you decide whether a targeted repair or a full replacement will best protect your home long term.
The Role of Professional Inspectors
You rely on a professional inspector to find damage that you cannot see from the ground: bruised shingles, fractured granules, compromised underlayment, and saturated decking that can lead to mold and structural rot. Hail in Winnipeg often ranges from pea-size to golf-ball size during peak months (May–September), and stones larger than 25 mm (1 inch) commonly cause impact fractures; an inspector trained in storm assessment will document those signs with photos, measurements, and moisture readings so you have a factual record for repairs and insurance claims.
Expect specialized tools and techniques rather than a quick visual glance: drone footage for steep roofs, thermal imaging to spot hidden moisture, and moisture meters to verify wet sheathing. A thorough report from a qualified inspector can change a repair recommendation into a full replacement when warranted, and proper documentation often affects whether an insurer approves a full claim.
When to Call in the Experts
Call an inspector after you see obvious problems—dents in metal flashing, gutters and downspouts packed with black granules, cracked or missing shingles, or water stains in the attic. You should also reach out if neighbours report large hail or local weather reports confirm stones over 25 mm (1 inch), since damage can be subtle at first but worsen through Winnipeg’s freeze-thaw cycles.
Contact an inspector promptly to preserve evidence and meet insurance timelines; aim for an assessment within one to two weeks after the storm if possible. Contractors who arrive immediately after a storm, offering high-pressure sales, large upfront deposits, or no written report are a red flag—get an independent inspection first so you know the scope and cost before committing to any repairs.
Evaluating Inspector Credentials and Experience
Look for inspectors with recognized certifications such as InterNACHI, NRCA familiarity, or manufacturer certifications (GAF, Owens Corning, CertainTeed) and verify they carry general liability insurance and WCB/workers’ compensation coverage. Ask for proof of business registration in Manitoba and request specific examples of hail inspections completed in Winnipeg—inspectors who can reference 30+ local storm assessments, dated photos, and successful insurance claim support demonstrate relevant experience.
Require a detailed, dated report that includes high-resolution photos, a roof sketch with measured hail impact locations, and clear recommendations for repair versus replacement. Be wary of anyone unwilling to provide references, an itemized written estimate, or who pressures you to sign a contract on the spot; these are common signs of storm-chasing operations that often leave homeowners with inferior work.
Prioritize inspectors who understand warranty implications: ask whether they document damage in a way that supports manufacturer warranty claims and whether they work with certified installers (many manufacturers limit extended warranties to certified contractors). Request examples of how they used non-destructive testing (thermal imaging, moisture probes) to find concealed damage—this level of detail separates a checklist-style inspection from one that truly protects your roof and your claim.
Documentation and Reporting
Capturing Evidence of Damage
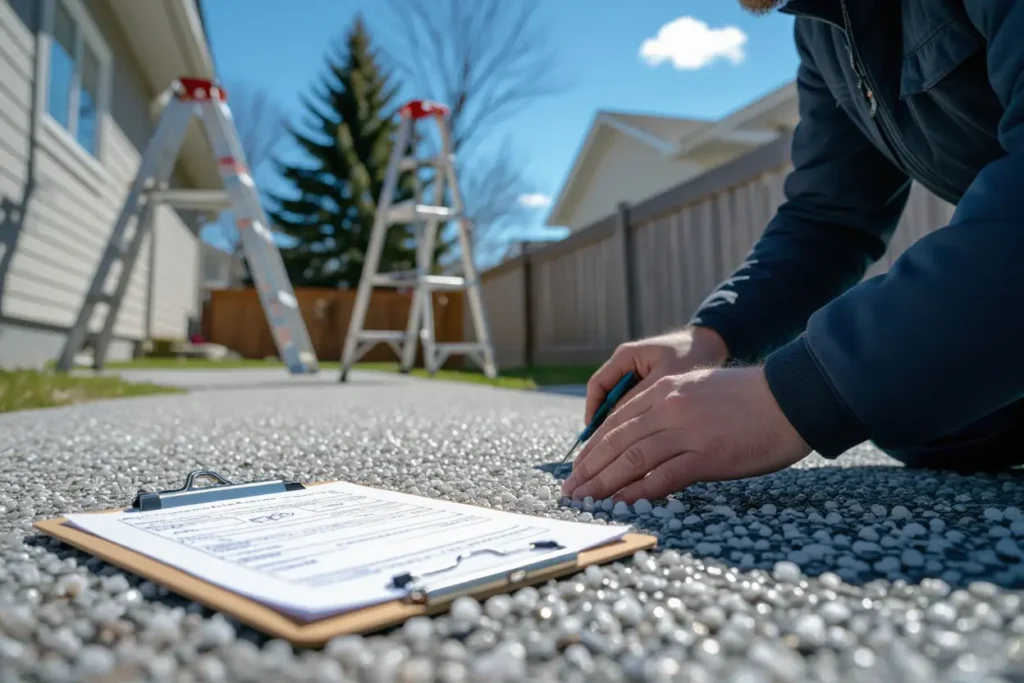
Start by photographing every elevation and roof quadrant (label them NW, NE, SW, SE) and include at least one wide shot that shows the whole house for context. Use a ruler or a coin in close-ups to provide scale for hail dents and shingle bruises; hail larger than 25 mm (1 inch) often leaves visible impact marks, and insurers expect a clear size reference. Capture roof penetrations—chimneys, vents, skylights—plus gutters, soffits, and downspouts where dents and granule loss show up most clearly.
Avoid walking on a wet, icy, or heavily damaged roof; instead, shoot from the ground with a telephoto lens, from a ladder used safely, or employ a drone if you have one. Time-stamp images and back them up to cloud storage right away; aim for a minimum of 20-30 images covering close-ups, mid-range shots, and aerial views so you can demonstrate damage distribution across the roof and to adjacent siding or vehicles.
Creating a Comprehensive Roof Damage Report
Organize your report with a clear header including your contact details, property address, storm date, and the time photos were taken, then include a labelled photo index referencing each image to specific roof locations. Provide a one-page summary estimating the percentage of roof area affected and flag any signs of active water intrusion (staining in the attic, wet insulation, sagging decking) so adjusters and contractors can prioritize emergency tarping or repairs.
Include measurements where possible—length of torn eaves, number of missing shingles, and counts of dented gutters or downspouts—and add contractor notes or preliminary cost ranges from at least two local roofers for comparison. Winnipeg’s peak hail months are May through August, so noting the storm timing and local weather reports (hail size, wind speeds) strengthens the claim; attach a link or screenshot of the Environment Canada event summary if available.
Label each page, keep an electronic copy and a printed folder for your insurer, and sign and date the report; a signed contractor assessment and photographic inventory with timestamps are often the fastest path to a timely settlement. If you engage All Weather Exteriors for an inspection, request a written scope that separates temporary mitigation (tarps, leaks) from full-replacement costs so you can present clear options to your insurer.
Navigating Insurance Claims After a Hailstorm
Understanding Your Coverage and Exclusions
Check your policy declarations page first to identify whether you have a named perils or an all-risk policy, since hail may be covered under one and limited under the other. Hailstones larger than 25 mm (about 1 inch) commonly puncture or fracture asphalt shingles and dent metal flashings—damage that most standard homeowner policies will consider, but payout methods vary between ACV (Actual Cash Value) and RCV (Replacement Cost Value).
Inspect policy language for specific exclusions such as pre-existing wear, deferred maintenance, or limitations on roofing materials and attachments; insurers often deny claims where age-related deterioration is the dominant cause. Note also that failing to perform reasonable temporary repairs after a storm can lead to denied coverage for resulting water damage, and municipal repair standards in Winnipeg may affect what the insurer will reimburse.
- Policy type: named perils vs all-risk
- Deductible: percentage vs flat-dollar and how it applies to hail
- ACV vs RCV: initial payout methods and requirements for recoverable depreciation
- Exclusions: wear and tear, improper maintenance, and prior damage
- The time limits for filing and documenting a claim can be short—notify your insurer promptly and keep thorough records
Tips for a Smooth Claims Process
Photograph all visible damage from multiple angles immediately and capture close-ups of torn shingles, dented vents, and granule loss; insurers value time-stamped evidence, and Winnipeg storms often produce localized damage that’s easy to miss without photos. Obtain a written estimate from a reputable local roofer—roofing professionals in Winnipeg commonly document hail size and impact patterns, which helps substantiate your claim and can speed up the adjuster’s decision.
Keep receipts for any temporary repairs, such as tarps or board-ups, and avoid permanent replacements until the insurer authorizes work, because initial payments may be ACV with the balance released after proof of repair. Expect an adjuster to inspect within about 5–10 business days in many cases, and prepare an itemized scope so you can compare contractor bids line by line.
Get at least one independent roofing estimate and choose a contractor familiar with Winnipeg building codes and hail-specific repairs; contractors who document both the damage pattern and the repair method reduce disputes over scope and materials. The
- Photographs: date-stamped, wide and close-up shots of all affected areas
- Receipts: temporary repair and mitigation costs saved for reimbursement
- Independent estimate: written, itemized quote from a local roofer
- Communication log: notes of calls, claim numbers, and adjuster names
- The adjuster may request in-person access to the roof—schedule promptly and accompany them during the inspection
Preventive Measures Against Future Storms
Reinforcing Your Roof’s Resilience
Upgrade to impact-resistant Class 4 shingles or a standing-seam metal roof in high-exposure areas; hailstones larger than 25 mm (1 inch) are commonly the threshold for shingle fracture, and Class 4 products dramatically reduce visible damage and blow-off risk. Add an ice-and-water shield at eaves and valleys, use sealed starter strips and high-tensile ring-shank nails, and consider increasing sheathing thickness where the deck shows sagging—these measures improve wind uplift resistance and help your roof survive gusts that frequently exceed 80–100 km/h during Manitoba storms.
Reinforce flashings around chimneys, skylights, and vents with continuous metal flashing and butyl or EPDM sealants to prevent the most common leak points after hail and wind events. Anchoring roof-to-wall connections with straps or clips and ensuring soffit and ridge vents are wind-secure lowers the chance of sudden failure; have your roofer verify fastening patterns and adhesive bond lines to manufacturer specs so warranties remain valid and insurers are satisfied.
Regular Maintenance to Mitigate Damage Risks
Inspect your roof at least twice a year—ideally in spring and fall—and perform a follow-up inspection within 72 hours after any hailstorm or high-wind event. Look for granule loss, bruised or split shingles, dented metalwork, torn flashing, and displaced vents; check the attic for fresh daylight, wet insulation, or new water stains that indicate hidden leaks before they grow into rot or mould.
Keep gutters and downspouts clear so roof runoff doesn’t back up under eaves, and trim overhanging branches that can abrade shingles during wind events; basic preventative tasks like tightening loose fasteners and replacing failed sealants typically cost a small fraction of a full replacement and can delay major repairs by years. Schedule a professional roof inspection every 1–2 years or immediately after storms that drop hail ≥25 mm or gusts over 80 km/h to document damage and prioritize repairs.
Document any suspected storm damage with time-stamped photos and a short checklist—dented HVAC covers, cracked vent pipes, missing shingles, attic wet spots—and compare against local Environment and Climate Canada storm reports to support insurance claims. Prompt action on signs of water penetration prevents mould growth and structural rot, which are the most expensive consequences of unchecked roof damage in Winnipeg’s freeze-thaw climate.
FAQs About Post-Hailstorm Roof Inspection
How soon should I inspect my roof after a hailstorm in Winnipeg?
Check your roof as soon as it’s safe — ideally within 24 to 72 hours. Start with a ground-level visual inspection (binoculars help) and an attic check for signs of leaks the next day. Photograph everything right away and keep time-stamped records for insurance. If you have active leaks, get a temporary tarp up within 24–48 hours to prevent further interior damage and call a local pro like All Weather Exteriors for a free inspection and emergency protection.
What common signs of hail damage should I look for from the ground and inside the attic?
From the ground, look for dented metal (gutters, vents, flashings), missing or dark patches of granules on shingles, cracked or blistered shingles, and small “pockmarks” or depressions. Inside the attic, watch for daylight showing through, wet spots, damp insulation, or new stains on the decking. Hail roughly 1 inch in diameter and larger often causes noticeable shingle bruising or granule loss; even smaller hail can dent metal components.
Can I safely climb on my roof to inspect for hail damage, and what tools should I use?
If you’re not experienced, avoid climbing a wet or steep roof—falls are a common cause of injury. Use binoculars, a camera with zoom, a sturdy ladder, and a flashlight for attic checks. Wear slip-resistant shoes and gloves if you do get on the ladder. For steep pitches, older roofs, or when damage looks extensive, hire a licensed roofing contractor (All Weather Exteriors offers on-site inspections) so you don’t risk injury or cause more damage.
What steps should I take immediately for insurance and repairs after I find hail damage?
Photograph and document all damage (close-ups and context shots), contact your insurer to report the claim, retain receipts for any emergency tarping or mitigation, and get a professional written estimate. Don’t sign away your rights or accept a quick cash “fix” from an unvetted contractor. All Weather Exteriors can provide a detailed damage report and work with your adjuster — in Manitoba, hail events often lead to multiple claims, so having clear documentation speeds the process.
How does hail affect roof lifespan, and how do I decide between repair and full replacement?
Impact depends on hail size, roof age, material, and how many strikes occurred. Asphalt shingles normally last 20–25 years; significant hail can strip granules, bruise the mat, and shorten that life. If damage is isolated (a few shingles with dents or missing granules), targeted repairs often suffice. If there’s widespread granule loss, multiple cracked shingles, damaged decking, or the roof is near the end of its service life, replacement is usually the better investment. Schedule a professional assessment — many Winnipeg homeowners opt for replacement after major storms because it prevents recurring leaks and insurance headaches.
Summing up
Presently, you should approach a post-hailstorm roof check with a clear, practical checklist: scan for missing or cracked shingles, heavy granule loss in gutters, dents in metal flashing or vents, cracked seals around stacks and skylights, and any new interior stains or drips. In Winnipeg, the main hail season runs from June–August, and hailstones larger than about 1.6–2 cm (marble size) commonly begin to cause shingle and siding damage, so focus your inspection on those telltale signs and document everything with dated photos.
Presently, take sensible safety steps—avoid walking on a wet or damaged roof and use photos to support any insurance claim—then call a qualified local roofer for a professional assessment. Hail is one of the more frequent causes of summer roof claims in Southern Manitoba, so acting promptly helps you protect your home, limit interior damage, and get repairs or replacements handled efficiently.
Leave a Reply
You must be logged in to post a comment.